On the record · 2026 · Independent
Umbra
A RAW developer for the Mac, built for how I edit: cull from the keyboard, dodge and burn in layers, print in black and white. It runs on my own machine today. It is not on the App Store yet.
- When
- September 2026 to now
- For
- Independent
- Role
- Design engineer
- Tools
- Claude, Xcode
- Platform
- macOS 14 or later, Apple silicon only
- Built with
- Swift 6, SwiftUI, Metal, LibRaw
- Status
- In daily use on my Mac. Not on the App Store yet
The brief
Umbra is a native Mac app that does three jobs I used to split across other tools: developing RAW files, culling a shoot, and managing the files on disk. It is meant to replace Lightroom or Capture One for the first and Bridge for the other two. It is for one photographer, three cameras and one laptop: a Fujifilm X100VI, a Leica Q2 and a Sony A7R III, on a MacBook Air M4.
The rules I set at the start were four. Shadow is where the detail is, so the tools for the dark end of the picture come first. Nothing is ever changed in the original file. It has to feel fast or it is no use. And no subscription, no cloud, no telemetry.
Your files stay where they are
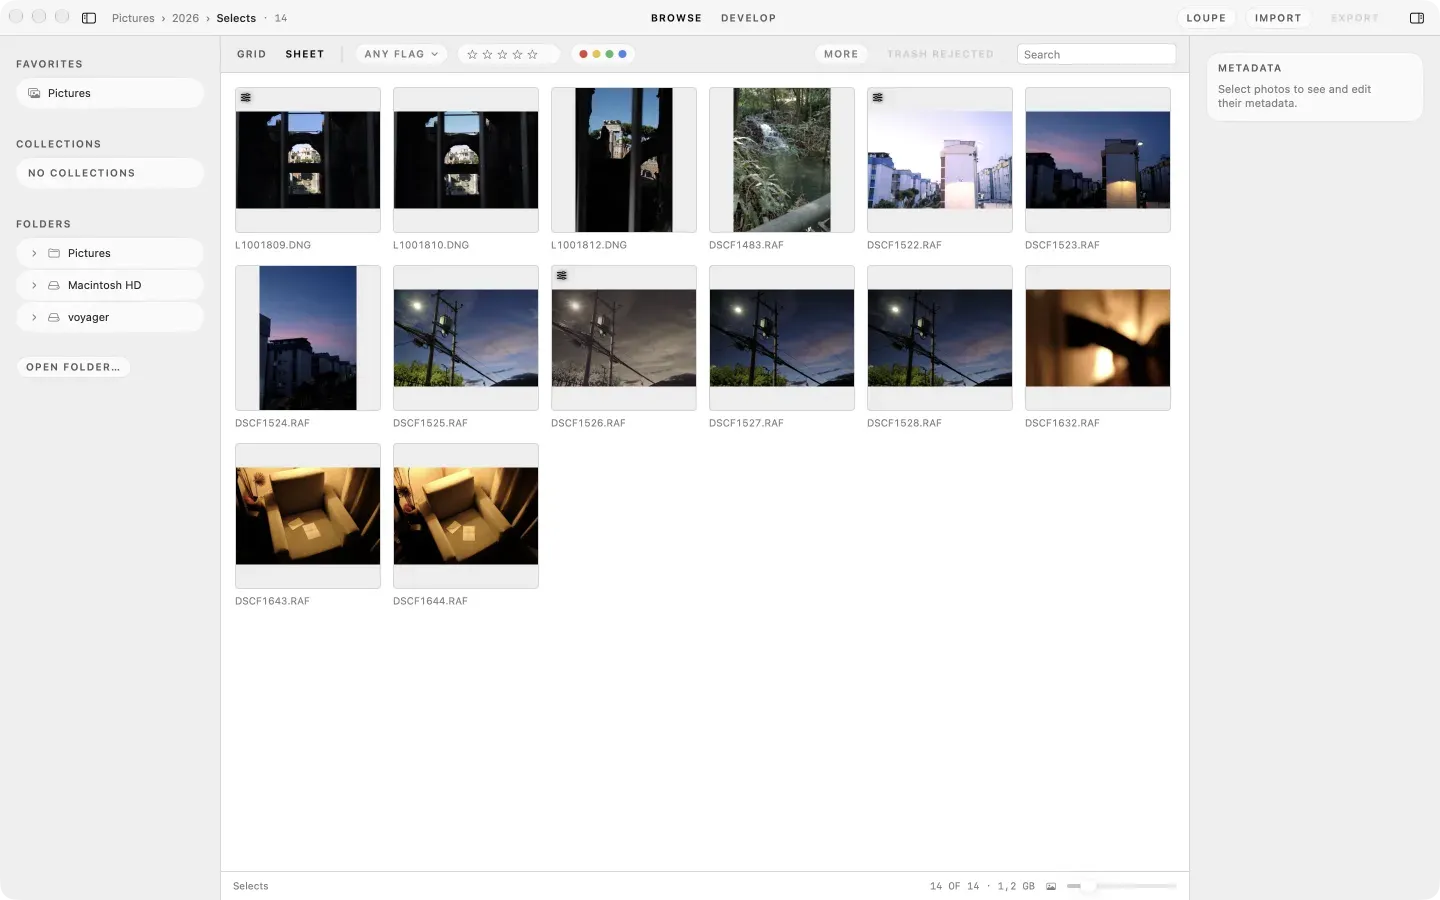
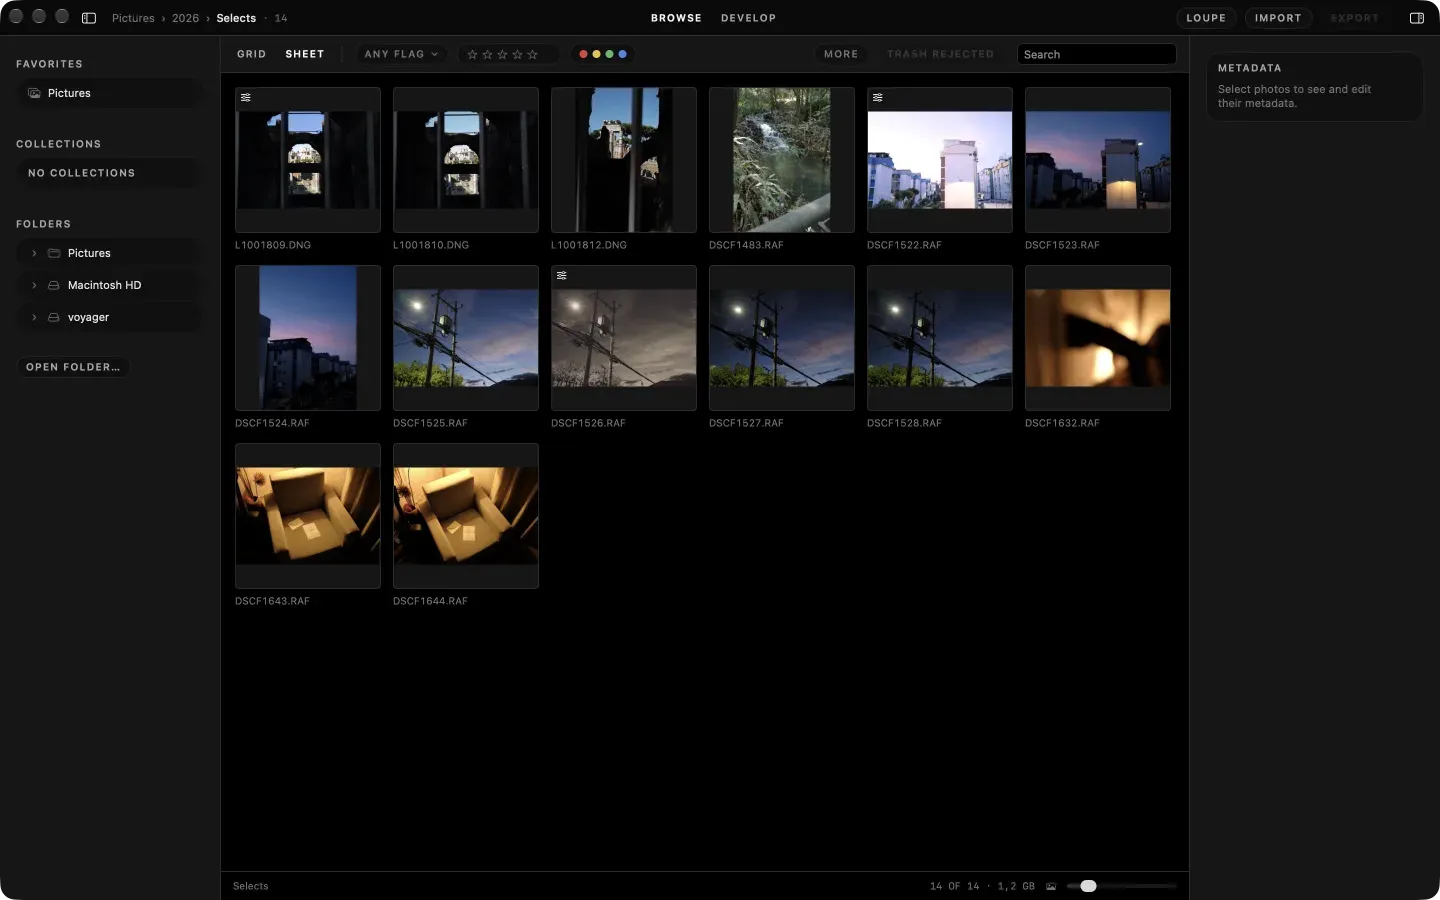
Most of the work in a photo app is bookkeeping, and I did not want my pictures inside someone's database. Umbra has no catalog. You open any folder, on the Mac or on an external drive, and browse it without importing anything. Edits are saved in a small file next to each photo, so the work moves with the photos. An index of the metadata exists to make search fast, and it can be thrown away and rebuilt from the files.
Cards are the one place a mistake costs something, so Import copies by date, reads every copy back and checks it before it counts, never overwrites a different photo with the same name, and never changes the card. Every write goes through one path that writes a temporary file, flushes it, and renames it into place, so a crash or a full disk leaves the old file or the new one and never half of one. I audited every operation that writes or moves a file on 27 September. A folder of 5,000 files with sidecars lists in 0.17 seconds.
Linear light, and dodge and burn as the main tool
The develop engine works in linear light on the GPU, so exposure, contrast and colour behave the way light does instead of the way a filter on a JPEG does. Camera matrices, a tone mapper that keeps hue, and a render that matches the file you export. I checked the chain from RAW to file in a colour audit: white lands at white, each transfer curve is applied once, the canvas and a 16-bit P3 export differ by 0.01 in colour difference, and the soft proof matches the sRGB export.
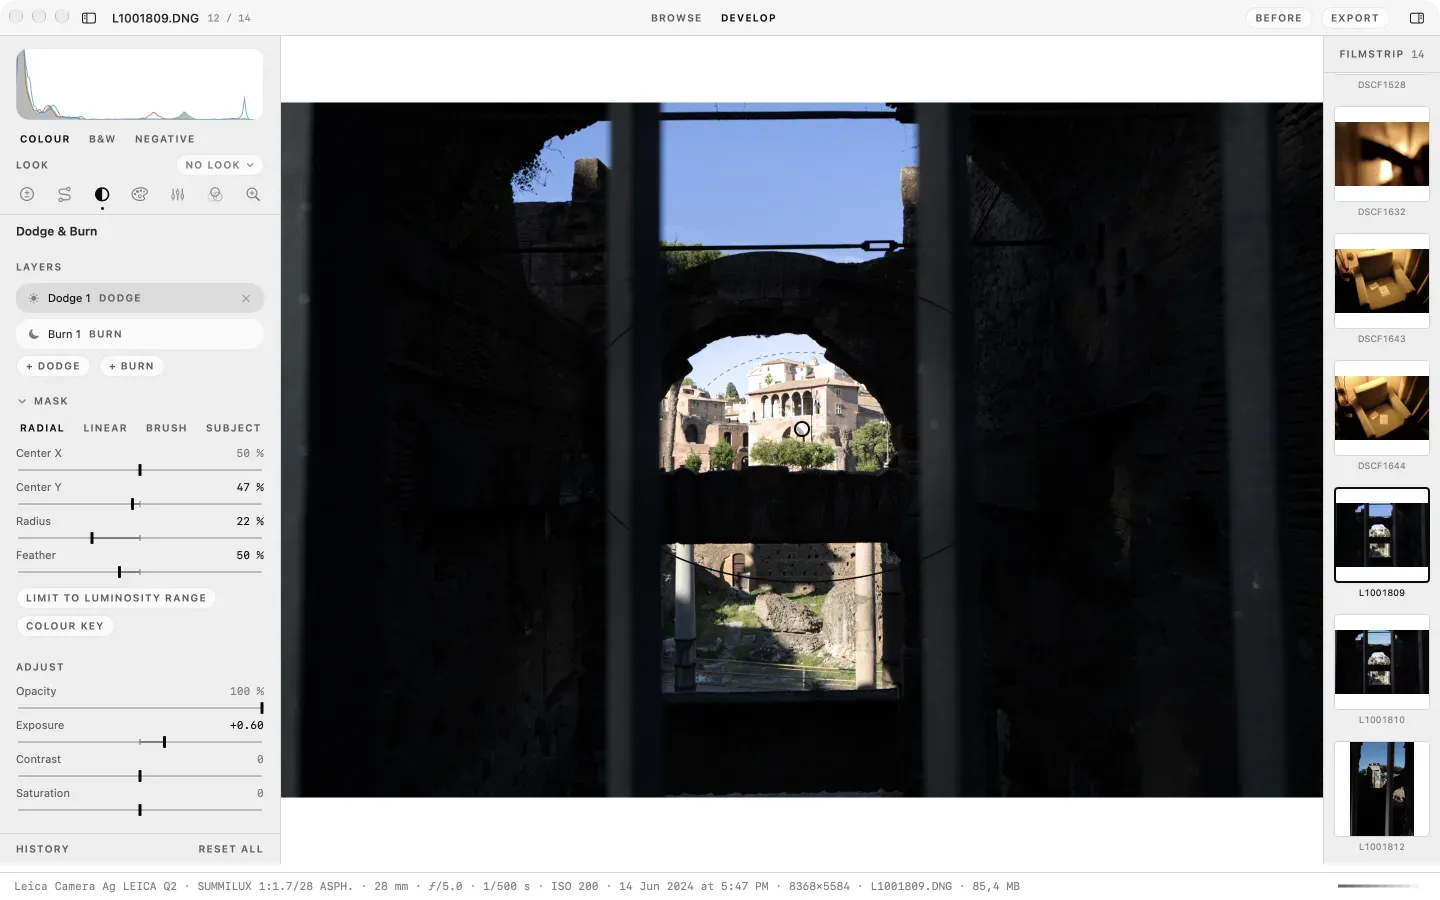
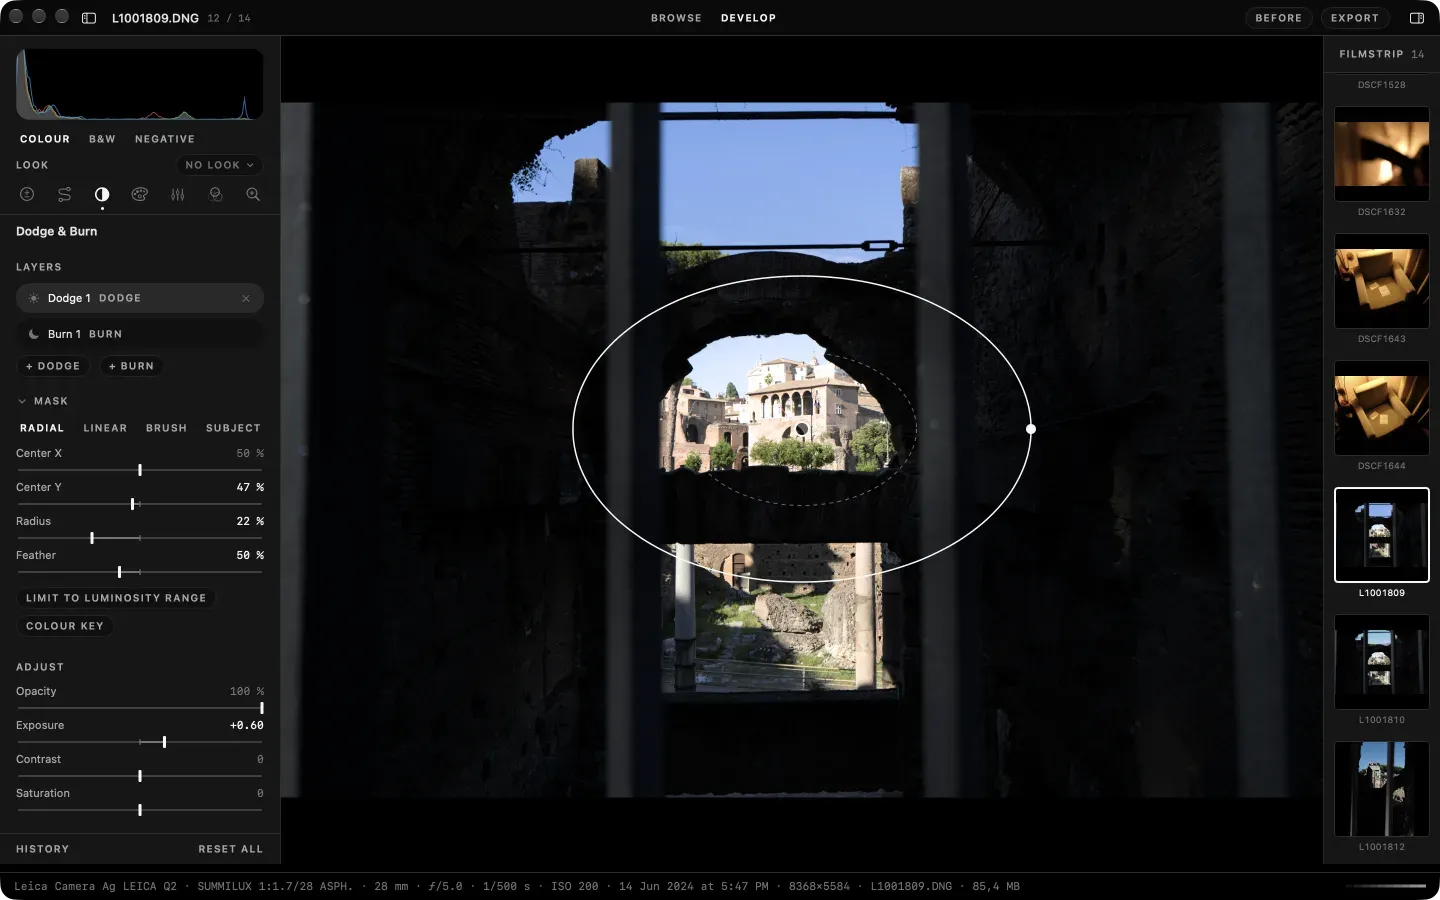
Local adjustments are the part I use most. A dodge or a burn is a layer with its own mask: brush, radial, linear, a luminosity range, a colour key, or a subject found on the Mac. Each layer has its own exposure, contrast and saturation. Hold Option while dragging any control and the canvas shows what it touches: clipped highlights, the mask, the pixels a colour band selects.
Black and white, printed
When a photo is switched to black and white the panel changes to the darkroom's tools. A lens filter (yellow, orange, red, green or blue) and an eight-band mix. Development from N-3 to N+3. Paper grades from 00 to 5, or split-grade soft and hard exposures. A flash to hold the highlights. Toning with sepia, selenium or gold, alone or split between highlights and shadows. These are the names a printer uses, on purpose, so the controls say what they do.
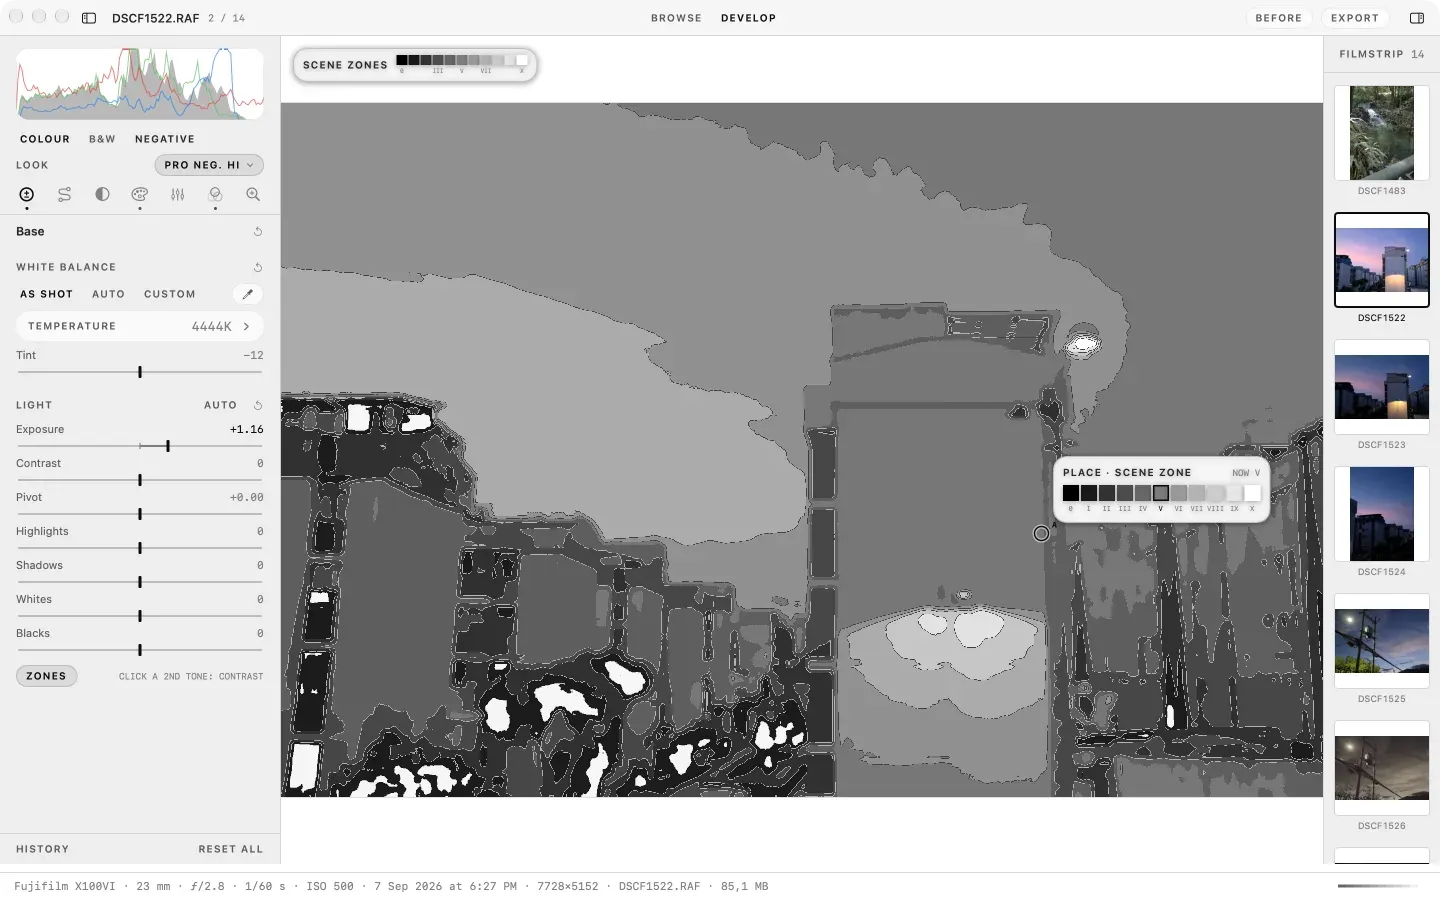
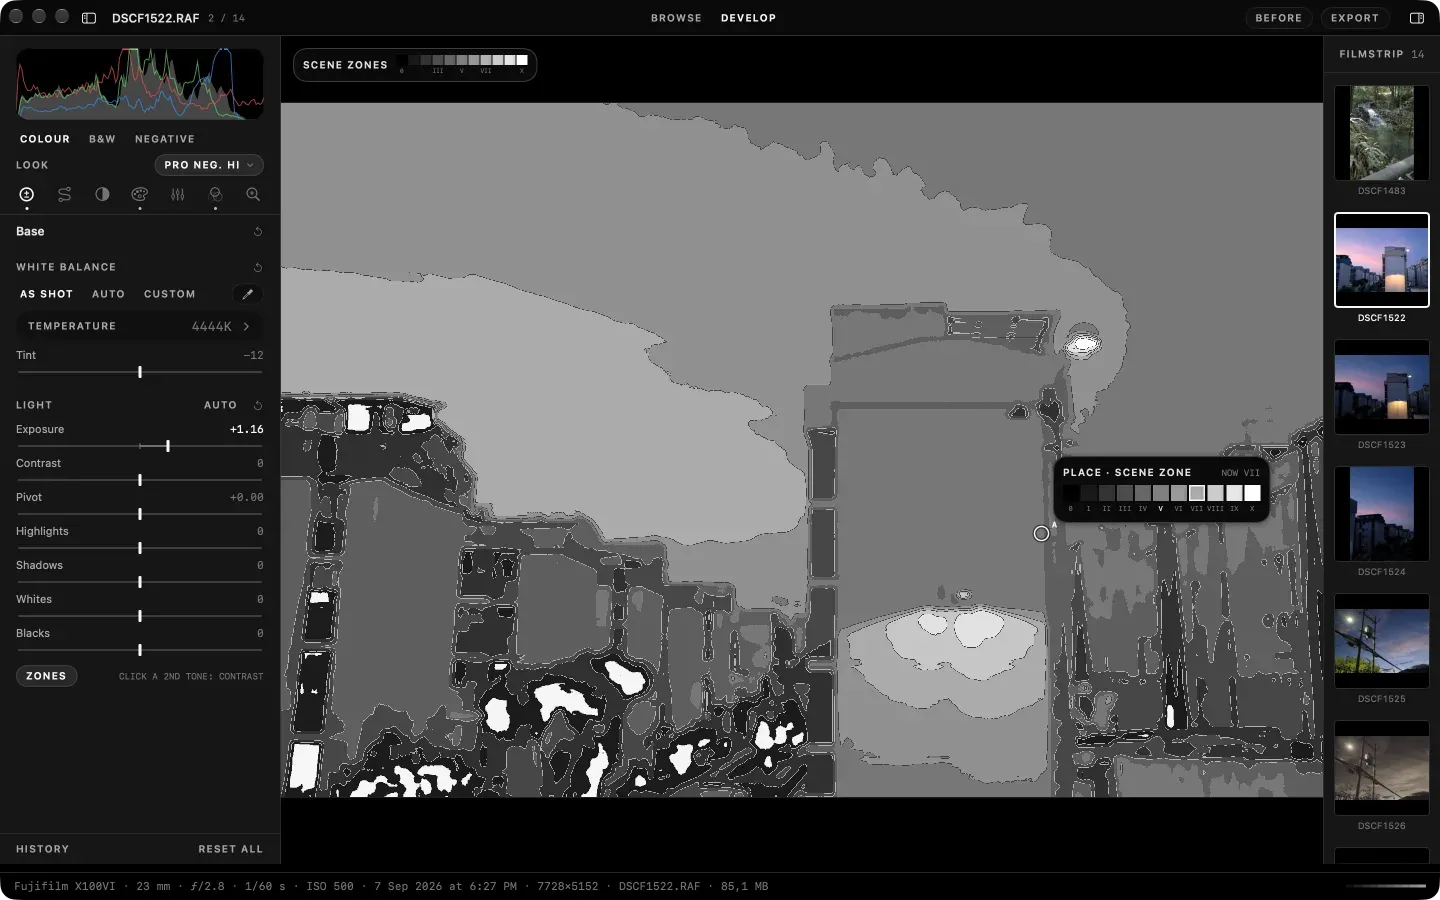
The Zones overlay shows the picture as eleven grey regions, zone 0 to X. Click a tone and place it on a zone. Place a second tone and Umbra sets the contrast to match.
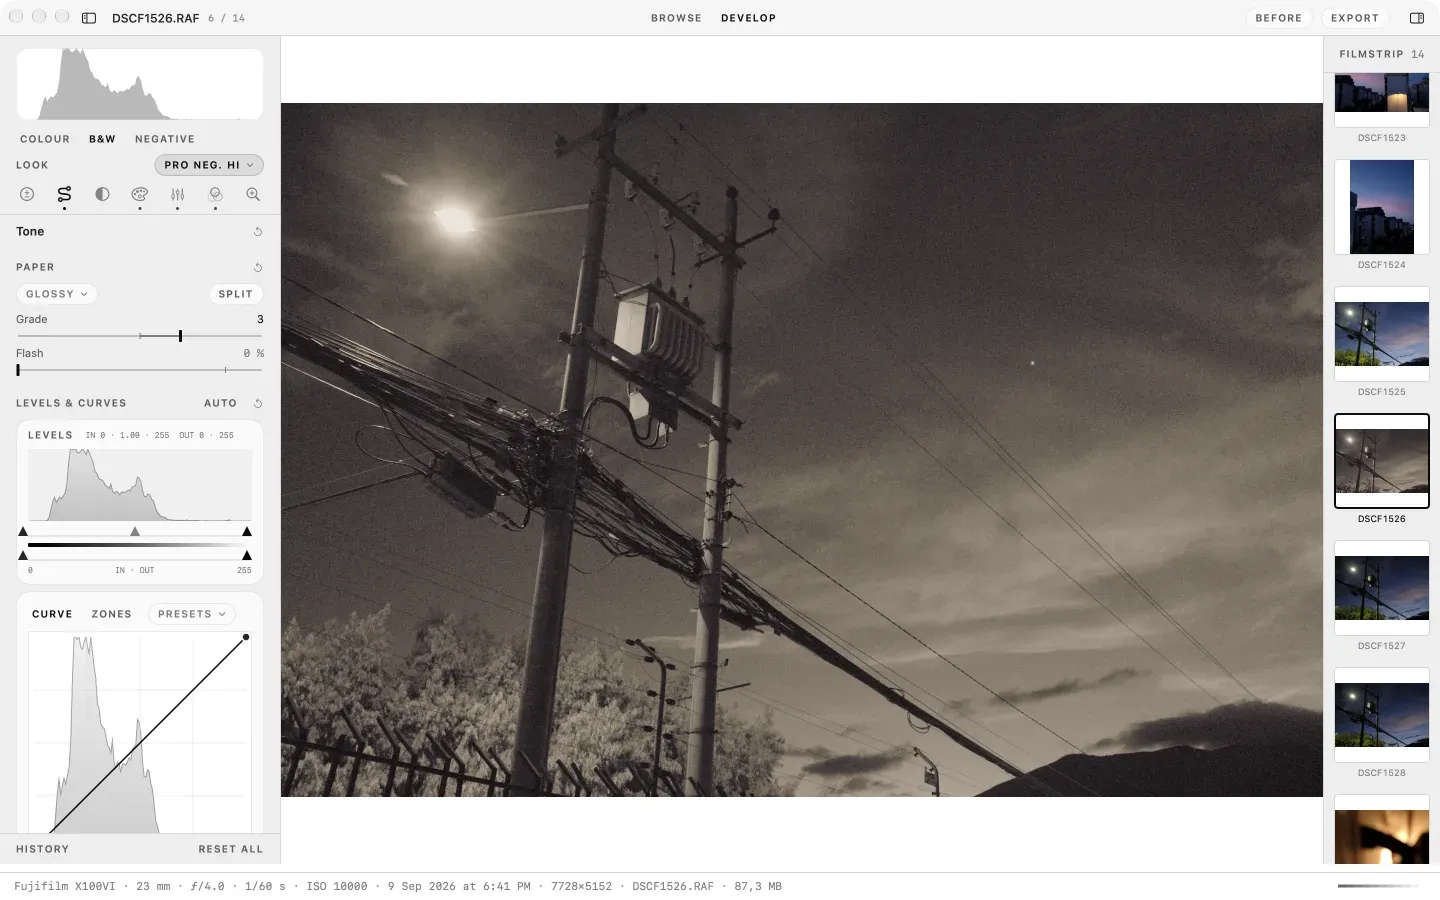
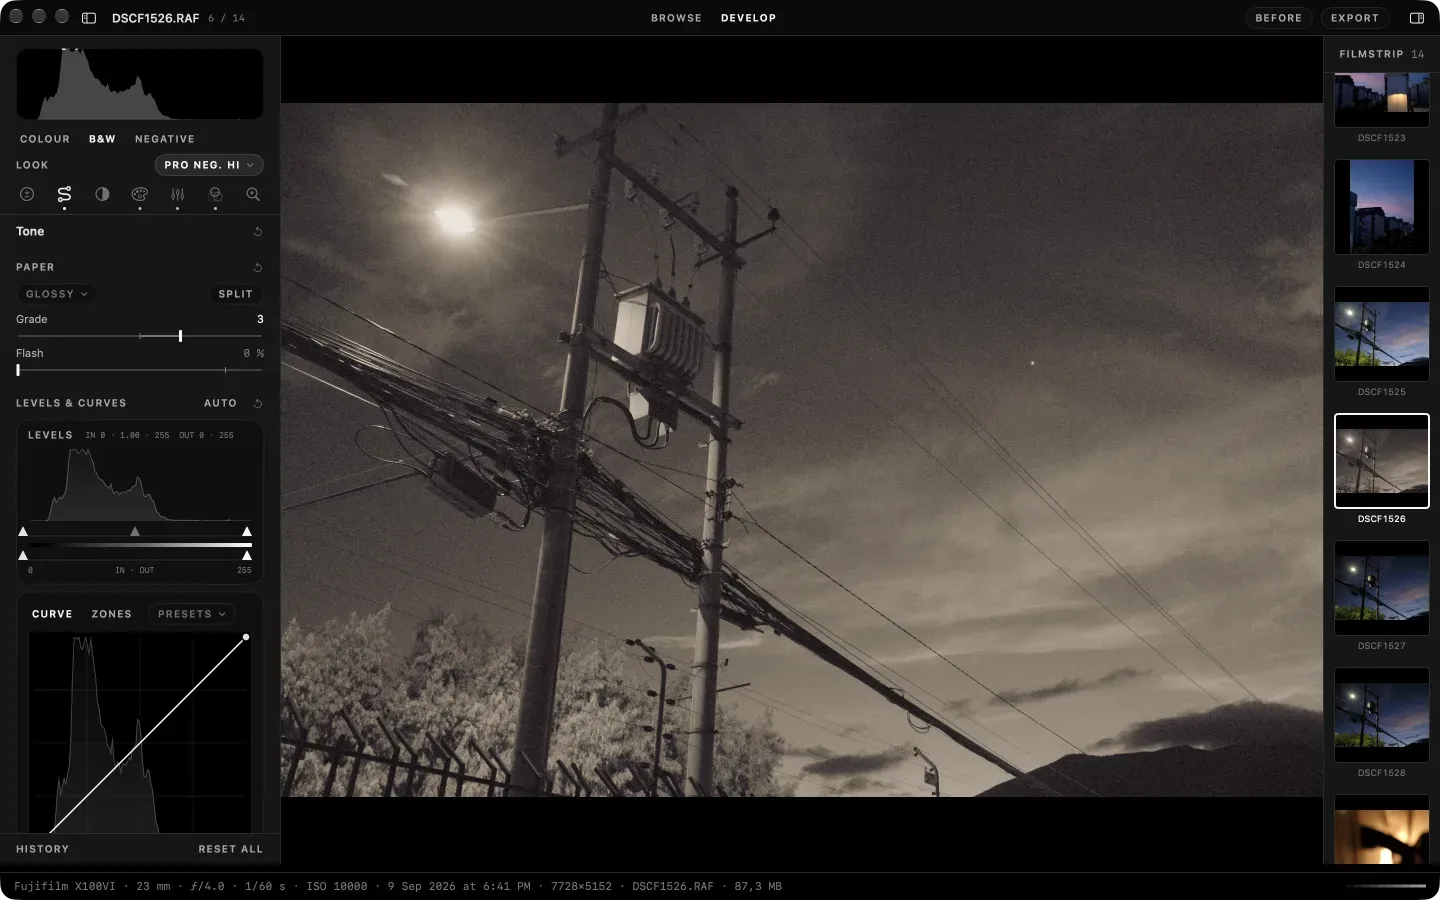
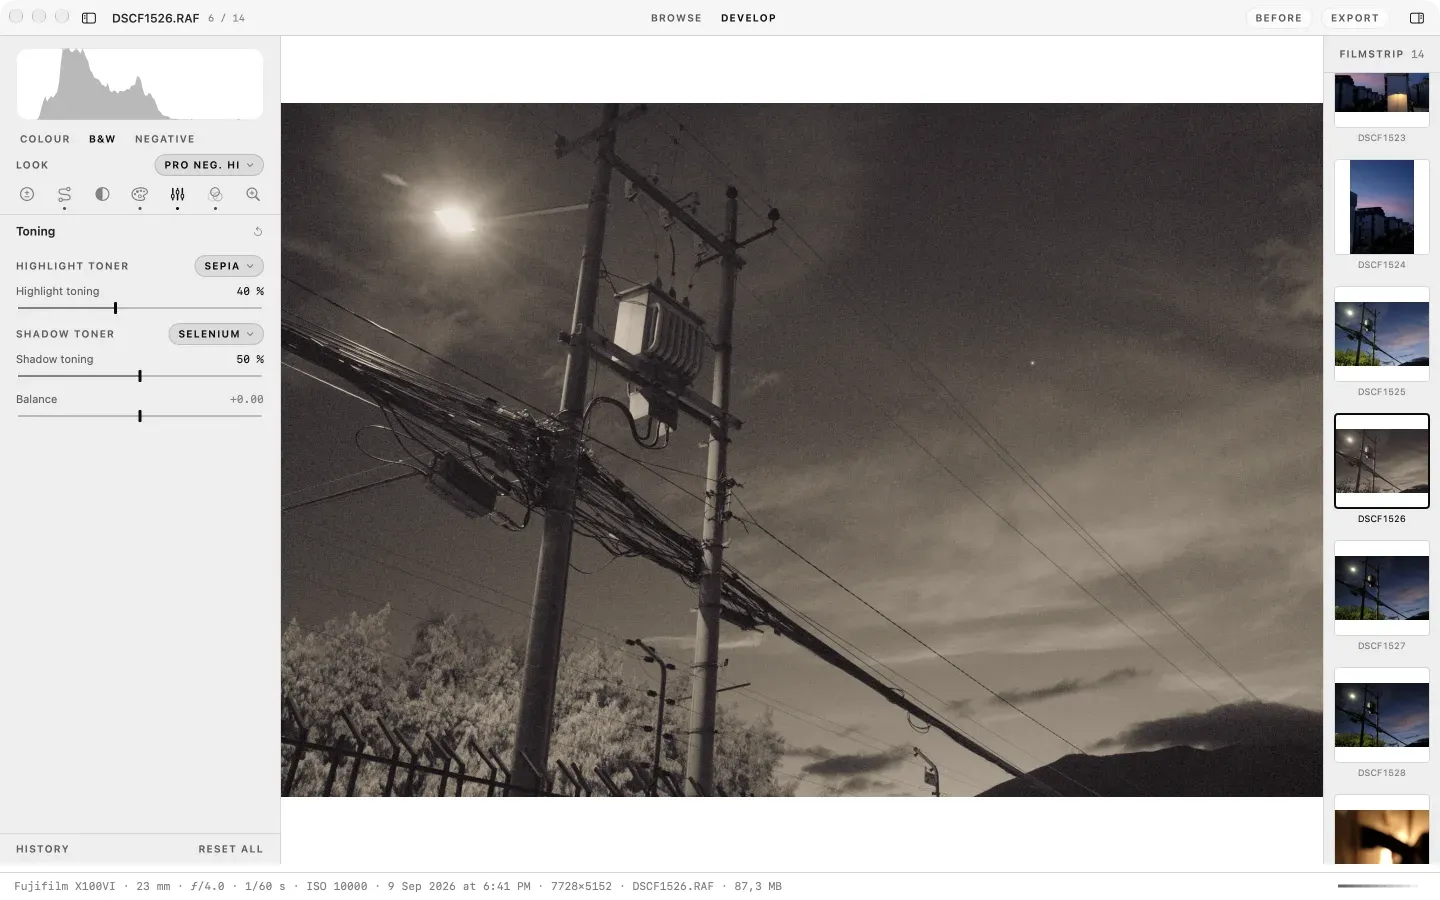
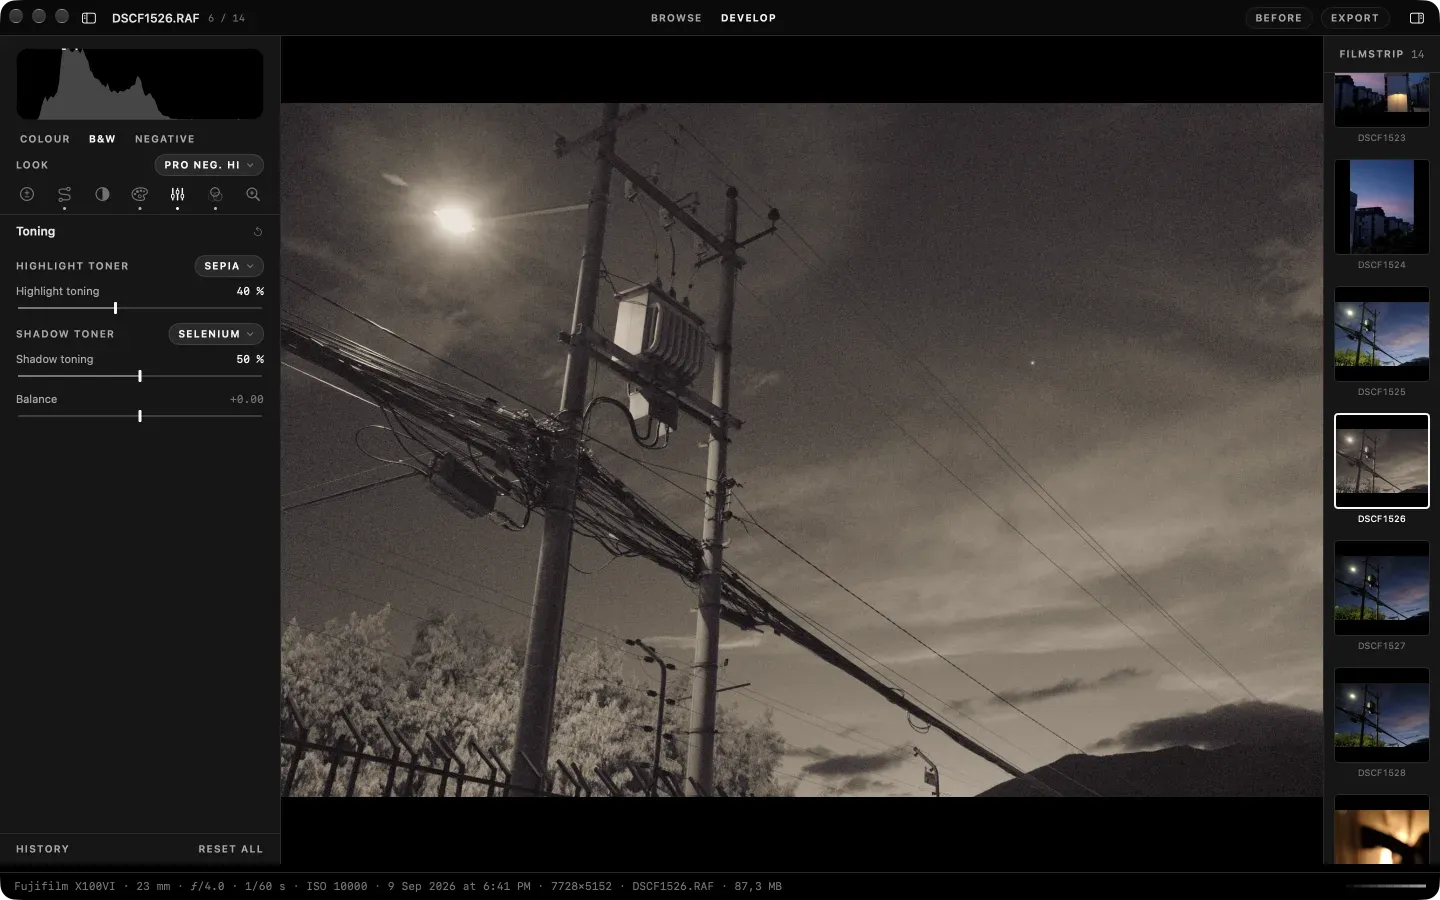
I changed the panel three times
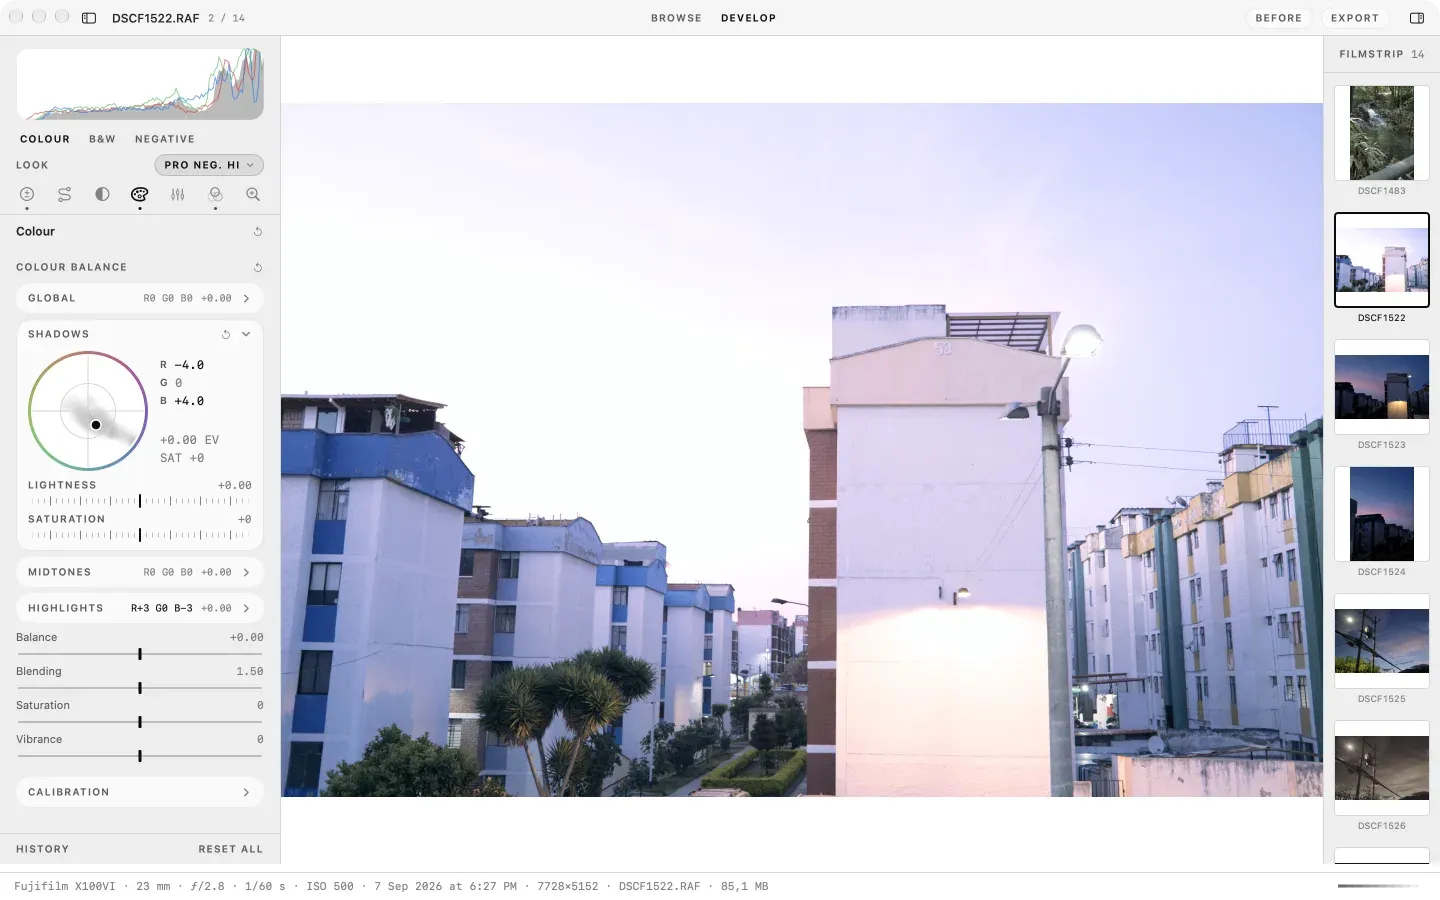
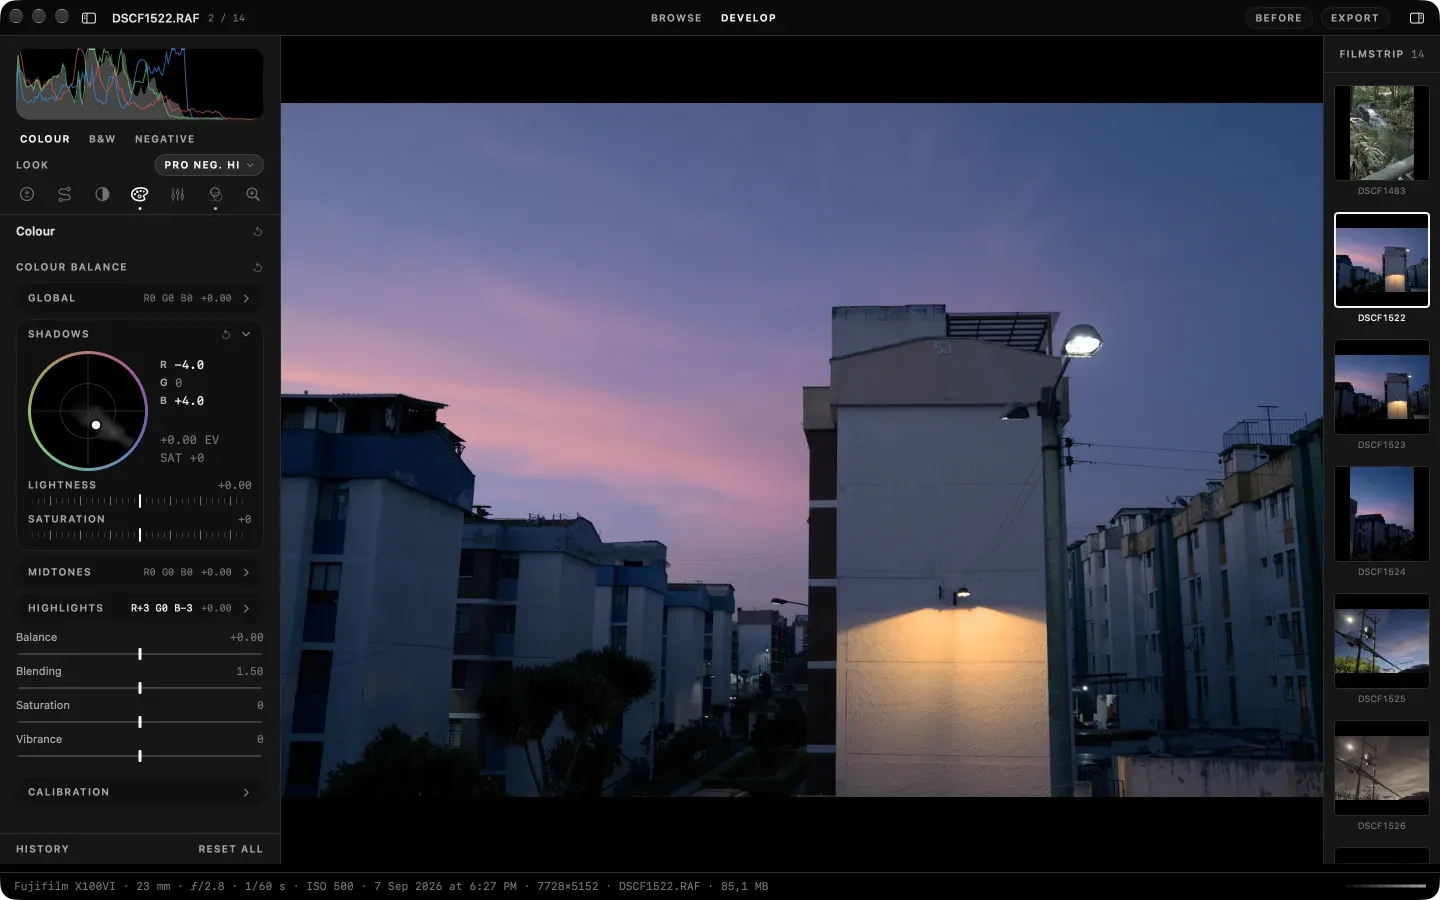
The tools panel is where I spent the most design time, and I got it wrong first. In the first version every control was a card with a large readout and a ruler, one control per card. It looked good and it was too long: 13 sections in one column, and at my 760 pt window the first screen ended at Exposure. The order did not match how I edit either, with Geometry above white balance and Layers, my main tool, tenth of thirteen.
On 4 October I replaced the column with seven tool tabs, in the order I work: Base, Tone, Dodge & Burn, Colour, Look, Detail, Crop. On 10 and 11 October I swapped most of the cards for slider rows, because a card costs 116 pt open and a row costs 34, and then rebalanced the tabs again: Colour and Colour Curves are separate, Detail and Crop share a tab, and the film-scan tools fold away until a film base is set. Base, the tab I open first, measures 472 pt and fits the 475 pt page. Tone is allowed to scroll a little.
Where it stands
It runs on my Mac every day, as a release build installed in Applications. It reads files from all three cameras, develops in colour and black and white, culls, imports, and exports JPEG, HEIC, TIFF and PNG. It has an export grain, soft proofing and a contact sheet as a PDF.
I have not put it on the App Store. The app is sandboxed and wired for it, the App ID is registered, and a signed archive builds locally. What is left is the App Store record, the price, the hosted privacy and support pages, and the screenshot photos. A small site for those pages is written and not deployed. The film-scan tools (a negative inverted to a positive, printed on paper-style controls) have only been tried on synthetic negatives made from digital files, because I have not yet scanned a real roll. Dust detection on real frames is the weak part: it finds between a fifth and two fifths of the specks.
Next on the list is tone and colour work I researched this week: colour inside a layer (temperature, tint, hue) and a zone equalizer, both built and merged on 11 October.